Dog Days of Summer $1 Sale!


My Indiana blogger friends and I are at it again!  This time with a Dog Days of Summer $1 Sale!  This sale blows my mind every time we have one.  The amazing discounts are out of this world!

For the next two days I will have 4 of my favorite products discounted to $1!  If you buy all 3 it is a savings of $5.50.  Who couldn't use a little extra cash in their pockets to spend on more amazing classroom materials?

I have included some of my favorite beginning of the year and fall products.


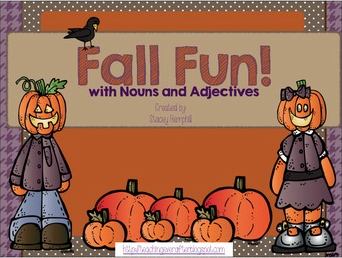
This is probably one of my all time favorite products!  Fall Fun! with Nouns and Adjectives features activities for both whole group and small group including Nouns Sort and a I Have... Who Has game.


The Lemonade Themed Accelerated Reader Pack is the perfect way to encourage little readers to reach for their goals and become stronger readers.


I love that I have Mystery Readers come to the classroom! We had our first reader for the new school year come yesterday and the kids LOVED every minute of it.  I even got the sweetest email from the mom.  Check it out:


Pumpkins Galore has been a huge hit in the past with my kiddos.  They really love Pumpkin War and even requested that I create more themed war games so I did with Love War (more to come this year).

Thank you for stopping by!  I hope you are having a wonderful start to your new school year OR are enjoying the last few days of summer.
Check out the amazing products from my friends below.
Stacey

0

Pop to Win Math Game Review

I recently had the opportunity to do a review for Lakeshore Learning.  I met up with Scott from Lakeshore Learning while in Vegas this summer and I fell even more in love with their products!  What a great guy with awesome ideas!


I reviewed the Pop to Win Math Game.  I have been searching for almost a year for different activities to use in Math centers.  This game fits right in with my idea.  It is for 1st grade, but there were other grade levels to choose from AND it relates to the Common Core Standards.  LOVE IT!


This game can be used at the beginning of the year with a small teacher led group and as the students gain familiarity and independence it can be easily incorporated into Math stations.  My kiddos had so much fun playing together!  We used only the Operations and Algebraic Thinking cards to wet our feet.  For some it was a challenge and for others it was a great way to review skills they already knew.


This is a must have for my classroom!  We cannot wait to play it again!
~Stacey

0

Mystery Reader

I started having Mystery Readers in my classroom last year.  Have you heard of it?  A fellow teacher did it in her classroom and I decided it was a great idea.


I invite all parents to sign up for a day to be our class Mystery Reader.  When they sign up they give me 3 clues about themselves.  My students try to solve the case prior to the reader coming in.  It was so fun watching them deduce who it was.  I even invited staff from around the building to join.  The kids were thrilled when that happened!


I love these collages because you can see the joy on both the parent and students face!  I am helping to create a memory that will last a lifetime!

Last year, I invited people through email and they signed up using a Google Doc.  I liked the Google Doc because people could see what dates were taken immediately.  The problem was a lack of participation from parents due to them not reading their email.  Shocker I know!

Most of my schedule was filled up with staff, such as the Dean of Students, Librarian, Secretary, and Art Teacher.  It was loads of fun seeing another side of them.

The Mystery Reader is in charge of choosing and providing the book to read.  Our Secretary shared a book about snowflakes called "Snowflake Bentley".

  
The kids were entranced by the different snowflakes and how they were so difficult to be photographed.  

Our Art Teacher's old neighbor published a book about the area where she grew up.  She ordered it online and shared it with the class. 

Our Dean of Students read "Skippyjon Jones".  He did the voice perfectly!  Lets just say that the students weren't the only ones cracking up!


I think your class would love to add this new tradition to the classroom.  I created a Mystery Reader Pack this year to encourage more participation. 


I will be handing out the invite letters at Meet the Teacher night.  I also included a thank you card in the pack that can be signed by the whole class.  There is a space inside of the card to print and attach a 5x7 photo of the Mystery Reader with their child or the class.  They will love the memento!

~Stacey


0

Crate Seats...Easy as 1,2,3!

Today I am going to share with you how I made my crate seats.  There are many blog posts about this very topic, but in case you haven't seen them I will share my way.  

Teaching Ever After

These crate seats have got to be the easiest project my husband and I have tackled!  Keep in mind that there are different dimensions for different milk crates, so I will not be giving you cutting dimensions.

You will need milk crates, fabric, sturdy wood, padding, a staple gun, and tools to cut the wood.

Teaching Ever After
I seriously got over 2 yards of fabric for $13!!
I purchased my milk crates from Target a few years ago.  When I was there a few days ago they did not have green, but had pink and another color.  The fabric came from Joann Fabrics.  I got a yard of each color and that was MORE than enough.  

Step 1: May or may not have started with my husband dumpster diving for wood.  We live in a developing neighborhood and there are tons of scraps.  I am not advising you to do this, but it is an option. Hehe!  I don't have a picture of him doing it unfortunately.

Teaching Ever After

He was able to score some 3/4" plywood.  It wasn't perfect, so he had to square it off with his circular saw.  

Step 2: He took the dimensions of the inside lip of the milk crate.  The wood will sit on the lip.  I am sure this project could be done in a different way if the crate does not contain a lip, but the crates I purchased from Target had the lip.

Teaching Ever After

Step 3: Using the circular saw (and all of the proper safety gear) he cut the plywood to the proper dimensions.  When he was done we tried to fit it in.  It did not work because the corners of the crate were rounded.  He took off a small amount off of each corner of the plywood to make it fit.

Step 4: We used foam mats to pad the plywood for a more comfortable seat.  It isn't like sitting on a comfortable couch, but it did the trick.  We trimmed the foam mat to size. 

Teaching Ever After

Step 5:  This is where I had some fun.  Up until this point my awesome husband had done all of the work.  I laid out the fabric face down and put the foam mat and wood face down on top of it.  I decided to cover the whole bottom portion of the plywood with fabric to prevent splinters.  I used my husbands air nailer that shoots staples with 18 gauge 1/2" staples.  I am sure that you could use a regular staple gun.  We just didn't have one at the house.  I stapled one side at a time being sure to pull the fabric tight each time.  When I got to the last two sides I wrapped it like a present.  

Teaching Ever After

That is all there is to it!  Easy Peasy!  I hope I explained this clearly.  If there are any questions PLEASE feel free to comment below.
~Stacey


1

Quietest Pencil Sharpener GIVEAWAY!!!

Hey everyone!!  You may remember my post a few months back about the most awesome pencil sharpener by Classroom Friendly Supplies.  If you did not catch that post you can read it {here}. Trust me you will want to read it!


Well, Classroom Friendly Supplies contacted me and asked if I wanted to give one away to my readers.  Um....yes!!!  So here it is my friends!  Complete the rafflecopter below and good luck!  If you are not the lucky winner you can still get a 5% discount on your very own sharpener using the code below by September 6th.  School starting soon?  No worries they arrive really quickly!  


~Stacey

79

Christmas in July Sale!!


Can I just say that we could not be holding this sale on a better day.  It is FREEZING in Indiana!  I can't handle anything below 75 degrees.  I am not kidding you!


I am linking up with some friends of mine for a dollar sale.  I love any excuse to shop at a bargain price, so lets celebrate Christmas in July!

I have 4 of my favorite beginning of the year items on sale for $1.  Trust me it will be the best 4 bucks you have spent. :)


My Classroom Management Tools has everything you need to get started off on the right foot this year.  I blogged about it {here}.


Monthly Writing Journals are a fun way to spruce up your writing station and an exciting way to have students share and collaborate.  I have a great way to organize them.  Check it out {here}.


My kids totally love the Groovy Cat.  So why wouldn't they be motivated by a Groovy Cat Clip Chart.


Fall Fun! with Nouns and Adjectives is one of my favorite products and I look forward to expanding on it soon. 

Be sure to check out all of the other awesome deals going on!
Happy Shopping!
~Stacey


0

Boogie Board Review

Have you heard of Boogie Boards?  I am not referring to the board that you used in swim class to practice kicking.  I am talking about LCD eWriter by iMPROV Electronics.  


I have been using them around the house and with my own kiddos this summer.  I love how durable they are.  My 2 year old has done about everything she can to it and it has held up.  She is not a dainty 2 year old.  She is rough and tough, so that is saying something.  Have I mentioned that it is scratch resistant?  Perfect!  


My son is starting Kindergarten in the fall, so we have been practicing letter formation with him.  You may or may not know that he has Cerebral Palsy, so fine motor is a challenge for him.  I love that the Boogie Board Original came with magnets, so I can easily attach it to any magnetic surface.  This is key for him because he has more control on an elevated surface.


I love to use the Sync 9.7 with him too, so we can track his progress.  I can easily add notes to his work before saving with the date and how the board was positioned.  It becomes a quick way to save his work and to track progress. 

So what is a Boogie Board and why do I NEED one in my classroom?
As I said before it is an LCD eWriter.  It is a great alternative to paper practice and it also takes away the pressure of getting it right the first time.  If you make a mistake you just push erase and it is gone!  I am so excited to use this in my classroom for Daily 5 Word Work practice among other uses.  I know my students are going to love the alternative to paper pencil practice and the excitement of using technology.  Really the possibilities are endless with the Boogie Boards.  I have been talking mostly about the Original, but the Sync is even MORE amazing!  You can actually save your work, hook it up to a computer, and retrieve your file.  How great would that be for documentation of progress or for accountability of independent work?!

I have to be completely honest!  I have been using the Boogie Boards for my own personal use around the house too.  I have one hanging on my refrigerator with a "to-do" list and the other by my desk with a TPT creation "to-do" list.  I love that I am not wasting paper with my endless lists AND the Boogie Board Original is small enough to slip in my purse to go to the grocery store.  

I am truly in love with this product and can not wait to use it in my classroom full of first graders!  I see more than one in my future!  Do you??

~Stacey

0

The Quietest Pencil Sharpener EVER!!

Hey Everybody!!  Today I am doing my first ever review and I could not have a better product for my first go.  I have the Quietest Pencil Sharpener Ever and you can find it at Classroom Friendly Supplies.


I received the sharpener in the mail very quickly and I requested one that would match my classroom.  It is bright pink also known as Precious Pink! LOVE it!  There are a few color choices to pick from.  As soon as I opened the box I could not have been happier.  

I immediately got out a pencil and tried to sharpen it.  I honestly have to tell you I had a little trouble, but there are some great troubleshooting tips and a video {here}.  As soon as I watched the video I tried it again and I had a perfectly sharpened pencil in seconds.  I could not believe the beautiful tip I had and how easy it was.  

Here are the steps to a perfectly sharpened pencil (I skipped the clamping part):
1. Squeeze the black cubes at the top and pull the silver portion out.


2. Insert the pencil while squeezing the black cubes.


3. Hold the sharpener at the top with your left hand and begin cranking with the right hand.  The silver portion will begin to retract as you crank
4.  You will feel and hear a difference in the sharpener when the pencil is complete.  Squeeze the black cubes again to remove the pencil. 


 I cannot believe I have been using junky school sharpeners and wasting my money on electric sharpeners.  I am not lying when I say this is the best sharpener I have ever laid my hands on!!  

I have some exciting news for you!  Classroom Friendly Supplies is offering you 5% off of your very own pencil sharpener!  You can use the code PAJVUC by September 6th.  Trust me you NEED this sharpener in your classroom or even home office.


Go grab yours to have in time for the start of the school year!
~Stacey


1

Daily 5 Second Edition Book Study- Chapters 5 & 6


Welcome back to my take on the newest Daily 5 book.  A huge thanks goes out once again to the Freebielicious girls for letting me link up!  Today I will be talking about Chapters 5 & 6.  Do you have your book yet?  No!  Go now!  I'll wait..........


Okay, before I continue can I just say how much I enjoy the pictures in this book!  I am a huge visual learner and the pictures are spot on!


Chapter 5- Launching Read to Self- The First Daily 5


The title says it is the first Daily 5, but it should also say the most important.  When launching Read to Self it is soooo important to lay down a STRONG foundation.  Without that foundation you will watch the building crumble down around you.  TRUST ME!!  Last year I was a little more lax than typical because I was dealing with a grade change and a tricky class.  I just never regained control over the way I wanted it to be.  Don't get me wrong they were still learning and growing a ton.  The volume and the stamina was just a little outside the norms.


This chapter is honestly something you are just going to have to read on your own.  It is full of important details to get the most bang for your buck.  The 2 Sisters go through their typical launch day.  It starts with the 3 ways to read a book.  I love this lesson because my low babies are usually really excited to find out what they can do IS reading!  What a powerful day for them!


After you teach them the 1st two ways to read a book, read the pictures and read the words, it is time to launch Read to Self.  When getting started make sure to refer back to the 10 Steps of Independence.  After one round with the younger kiddos you stop for the day and move onto teaching the foundation lessons for the other Daily 5 choices.


I love that the 2 Sisters included this information in this book because I was always asking myself what to do with the remaining time in my reading block.  I swear they were in my head because their answer was to teach foundation skills for other D5 choices.


Here are some of the foundational skills they recommend starting with:

I PICK Good-Fit Books- it is essential to give your students the knowledge and power to realize how and what are good fit books for them.  The 2 Sisters recommend using this:


I select a book and look it over, inside and out.

Purpose: Why might I want to read it?
Interest: Does it interest me?
Comprehend: Do I understand what I am reading?
Know: Do I know most of the words?


If the student can answer yes to all of the above questions than they have found a good fit book!


I created a bookmark has a reminder on how to pick a good fit book.  Grab this freebie {here}!!


Underline Words You Don't Know How to Spell, and Move On- I practiced this kinda sorta last year and my students wanted nothing to do with it. LOL!  They wanted to know the correct spelling and they would ask another adult or student before moving on.  I think more modeling is in my future.


They hit the other foundation skills in Chapter 6, but they do list the ones you could start off with in the first few days of practice.


Chapter 6- Foundation Lessons

As I said before you must start off with a strong foundation.  So in Chapter 6 the 2 Sisters go into depth about quite a few of them.  This is another one of those chapters I STRONGLY urge you to read.  I really love how they broke the foundational skills into the different D5 choices and really explained their way of doing it.  There was so much in this chapter I am only going to pick 2 of my favorites.


Read to Someone

EEKK (Elbow, Elbow, Knee, Knee)
This is one of my favorites to teach the kids.  I just love EEKK!!  You wouldn't think that students would sit any other way, but I have had kids with their backs to each other or one laying down and the other sitting.  I mean good grief!  You are supposed to be working TOGETHER.  There was a new thing that I liked about EEKK.  They said the kids could sit EEKK on the floor OR in chairs.  This was another one of those rule breaker things I was doing.  I felt relieved that I would be doing that no more.


How to Get Started

I cannot tell you how many times I would look up from my small group and see a group of kids with all of their books from their boxes playing "eeny meeny" to choose which book they would read first.  While that was a fair way to choose it took FOREVER and books always got mixed up.  It made be crazy!
Here is a list of suggestions:
Good Manners- this one is my favorite because I am BIG on good manners in my class, so I plan of encouraging this one.
Let's Make a Deal
Rock, Paper, Scissors
Youngest First
Alphabetical Order


Like I said their is a TON of info in these 2 chapters.  I seriously only skimmed the surface.  I really encourage you to pick the book up and read these chapters over and over.  I know I will!


I also created this Check for Understanding freebie.  This is included with the I Pick bookmark.  I recommend printing and laminating back to back.

Enjoy!
~Stacey



1

Bright Ideas!- Class List using Photos


I am so excited to be linking up for this month's Bright Ideas link up!!!  I have been finding all of the past few posts so inspiring and the best part is no one is pushing products.  They are just plain and simple bright ideas!  Love it! 


This month I am sharing a spin off of an idea I actually pinned last summer from Keepin' It Kool in Kinderland.  I know before I got my teaching job I reluctantly subbed to get my foot in the door.  Oh my I had some doozy days!  That is a whole other post.  Anyway, class lists were typically left and were nice and name tags were sometimes on desks, but I really had to work to figure out who was who.  Plus there is usually the note that Johnny is really helpful or keep your eye on Susie.  I wanted to know who these kids were.  When I saw this pin I knew I needed to make a photo class list for my own class.

It is so easy to make !  You know those little pictures that you receive from the photography company after picture day?  Those are perfect to use because they have adhesive on the back of some sizes AND it already has their first and last name.  If you can't wait to receive those little pictures then you can do a photo shoot on the first day and print them to a little wallet size.

I punched out a picture of every kiddo and got out a piece of card stock.  I turned the paper horizontally and lined the students in rows.  After I figured out proper placement I peeled off the backing and stuck it down.  I made sure to leave room under each photo.  This was especially important this school year.  My students were always coming and going, so I wrote times that they left the room, special little notes about each student, and you could even add transportation info.  I write it in pencil, so I can make changes neatly throughout the year.  This idea was actually intended for my sub folder, but I referred to it often! 

So there it is... a super simple Bright Idea!  If you liked this Bright Idea please consider following me on Instagram, Facebook, and Pinterest.  You can also check out my Bright Idea on How to Stay Organized a Month at a Time.

For more Bright Ideas from over 100 different bloggers feel free to browse through the link up for something that interests you.

Thanks for stopping by!
~Stacey

   
3
Back to Top